
R154 Clutch Release Bearing Assembly Guide
- Kuruma Factory

- May 2, 2025
- 2 min read
Updated: May 12, 2025
One of our most asked questions is "how do you assemble the clutch release bearing?" and with a good few parts which are all different sizes we aren't surprised. So here it is, out came our trusty exedy clutchto create the assembly guide ready for that new clutch install you have planned.
Tools Needed
Snap ring pliers
(While not completely necessary these make the job of installing or removing the snap rings a piece of cake, these were purchased on Ebay for a whopping £7.62 delivered)

Parts Check List
Number 1, small spring washer
Number 2, small flat washer
Number 3, small circlip/snap ring
Number 4, large flat washer
Number 5, large spring washer
Number 6, large circlip/snap ring
And of course the release bearing and the bearing carrier.

Step 1
Stand the release bearing carrier on it's end as seen in the picture (smaller diameter end to the top).

Step 2
Place the small spring washer (part number 1) on the ledge.

Step 3
Now slide the small flat washer (part number 2) on so that it sits on top of the spring washer.

Step 4
Now its time to slide the release bearing itself on, take note the larger diameter hat is at the top.

Step 5
Time for the small snapring (part number 3), open the snap ring using the pliers, place on to the release bearing and with the other hand slightly push down on to the release bearing allowing the snapring to locate in to the groove on the carrier that secures it in place. This step can be completed using a screwdriver starting one end of the snapring and easing round it in to the groove although the pliers make the job much easier and reduce the risk of snapping the ring.

Step 6
Turn the now complete carrier up the other way round and through the hole in the clutch pressure plate.
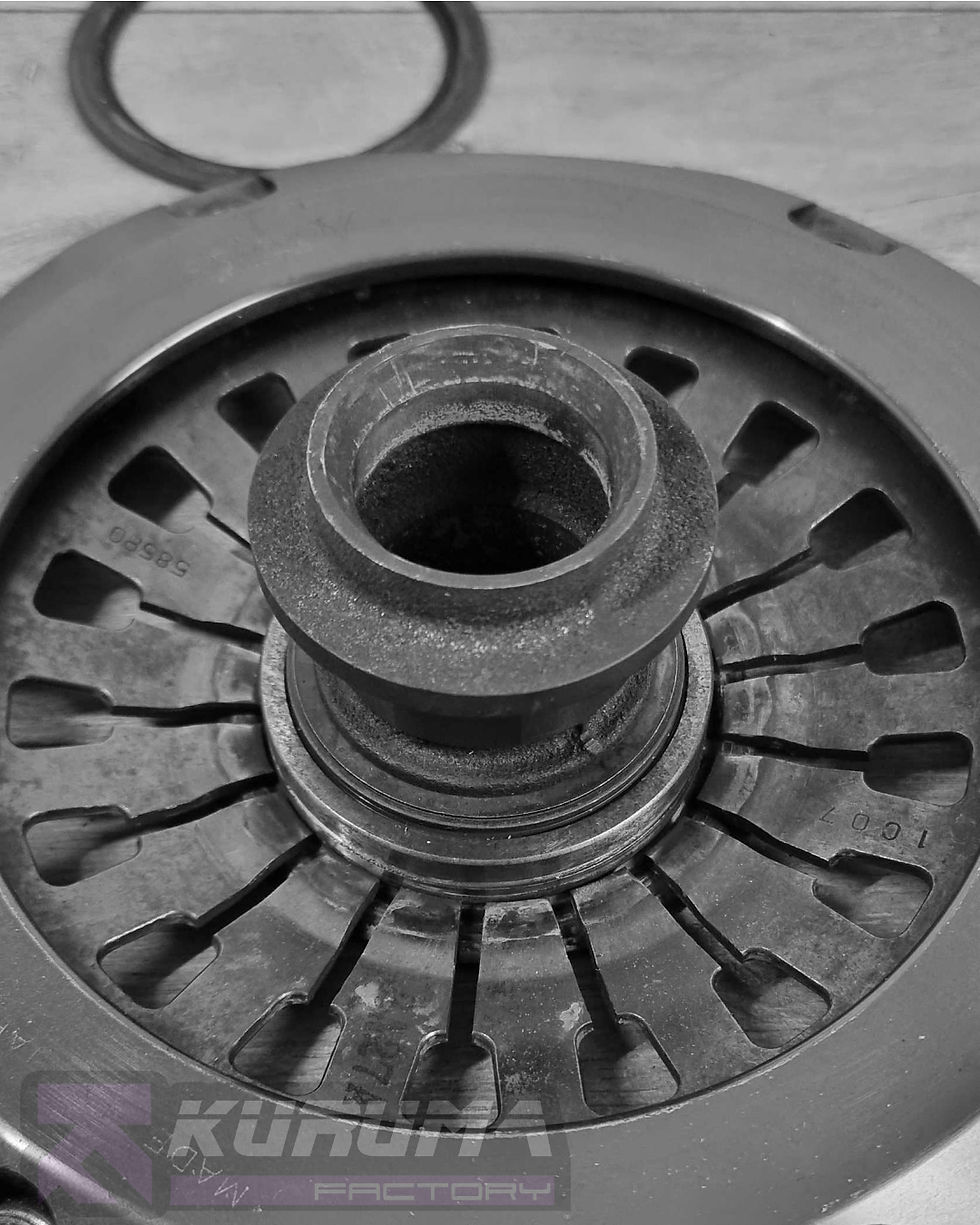
Step 7
Place the large flat washer (part number 4) over the bearing assembly.

Step 8
Next place the large spring washer (part number 5) on top of the flat washer.

Step 9
Time for the large snap ring (part number 6). Using the pliers open the snap ring and place on top on the spring washer. Using your other hand ease the snapring in to the groove that locates it, at the same time this will mean the spring washer becomes flatter holding everything in place.

Your assembly should now look like the above and is ready for install. This guide will work for any of the R154 pull type clutches but the aftermarket clutches that use a push type release bearing (not many do), installation will be specific to them.
As always I hope the guide helps and good luck with the installation.


Comments