
Coil On Plug Kit Install Guide
- Kuruma Factory

- May 1, 2025
- 4 min read
Updated: May 12, 2025
Our cop 1Jz vvti conversion kit is now available through the website; as promised, this is the installation guide. The installation should take around 30 minutes from start to finish. This guide will help you through installation and the wiring order correct for your chassis will have been emailed to you.
Tools needed
4mm allen key
5mm allen key
10mm socket
Small sharp scissors/knife
De-pin tool (supplied)
Coil pack modification details
The modifications can be undertaken with a hacksaw, Dremel / rotary tool or even a grinder.
1. Turn the coil pack on its top.

2. Remove rubber seal.

3. Using your preferred method of cutting follow the base line (cutting into the securing tab and not the base) as seen here.
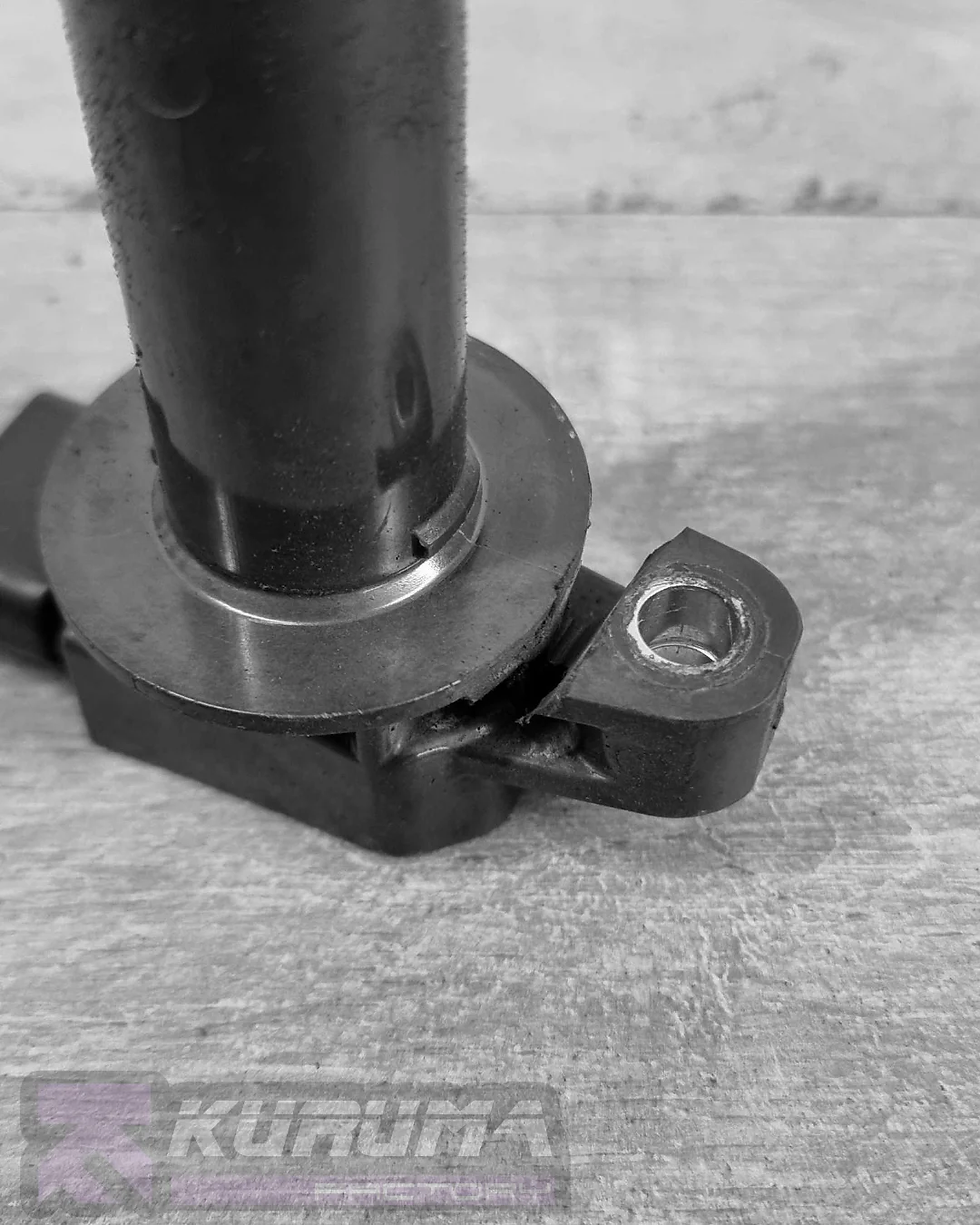
4. Flip the coil over and cut straight down to completely remove the tab.
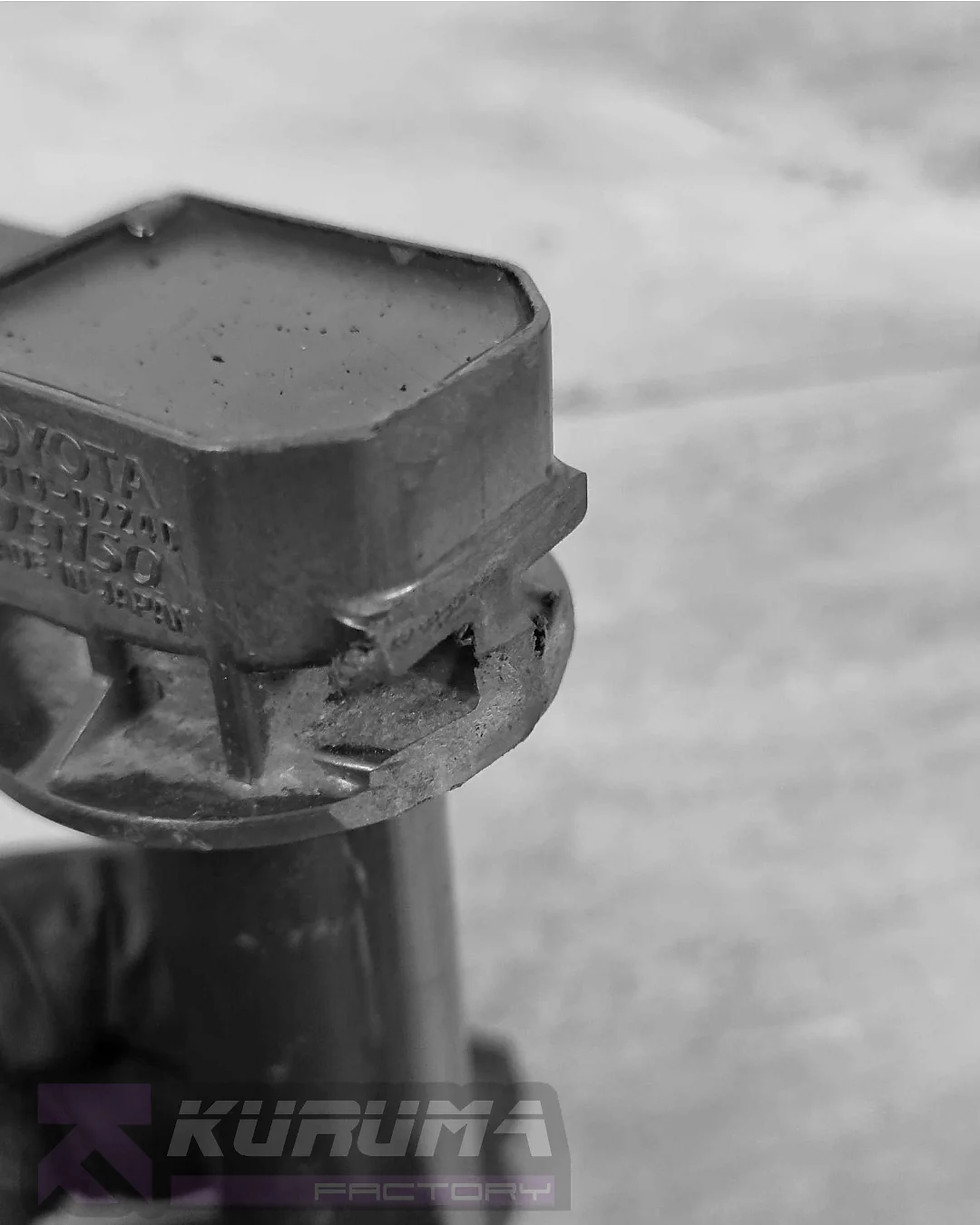
5. Tidy/smooth the cut on the pack and replace the rubber seal ensuring it's seated correctly under the securing tabs.

Installing the plate and coil packs
1. Using the allen keys remove the 8 bolts for the top covers (silver plug cover and the top engine cover) to reveal the coil packs and leads.
2. Next step is to unclip the three coil pack harness clips. This loom can be cut and removed to tidy things up or fed alongside the injectors for a less permanent solution.
3. Remove all 10mm bolts for the three coil packs and (if still fitted) the ignition lead tidies.
4. Lift out all three coil packs and ignition leads leaving just the spark plugs installed.
5. Place one washer on the male thread of the standoff and install it to the first, third and fourth threaded holes (working from the front of the engine backwards, it's the same holes that held the o.e coil pack bolts) until the washer is pinched and the standoff is a little more than hand-tight. It's good to mention to be careful at this point as many of these threads have been damaged in the past through overtightening.


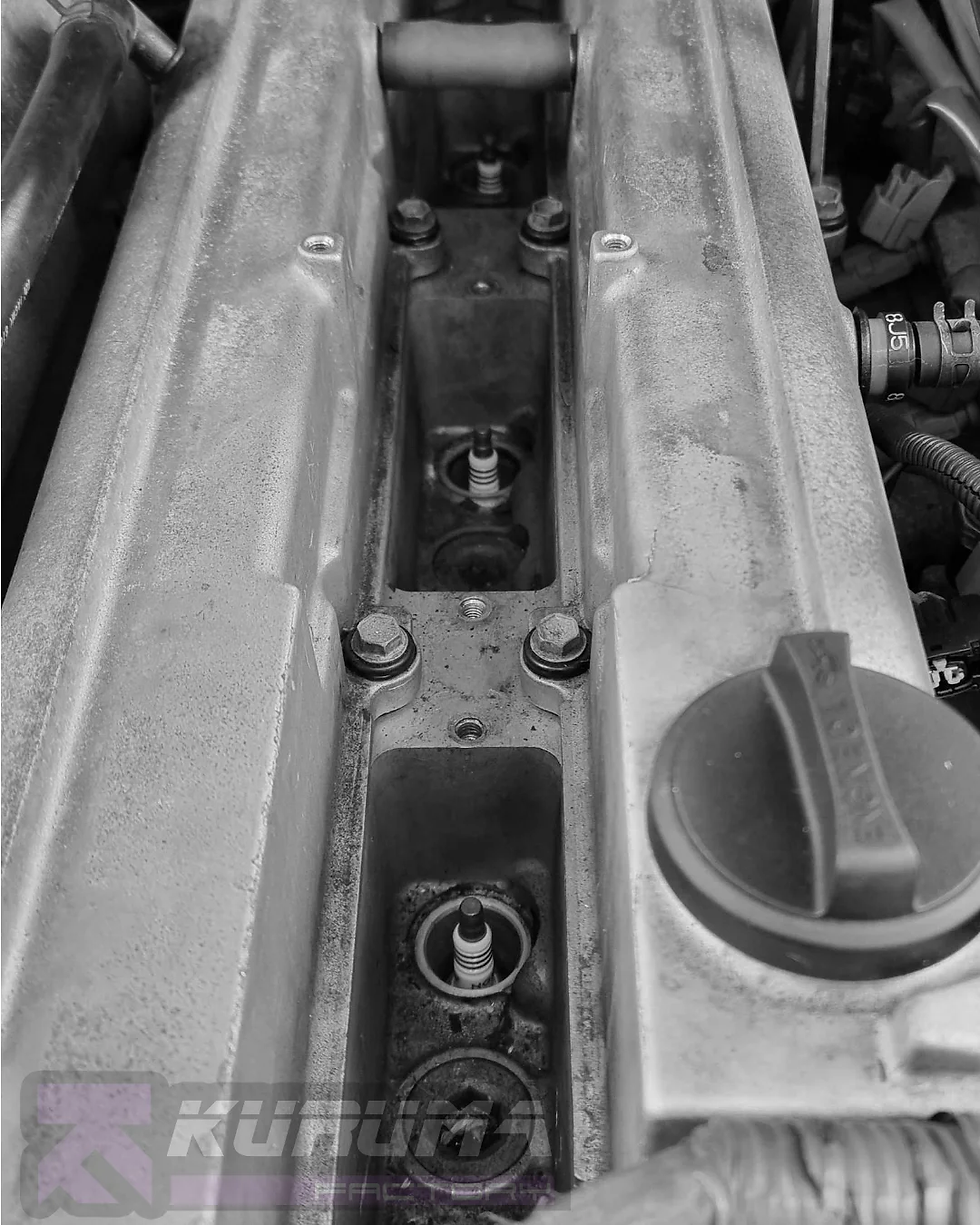
6. You will notice there is a ventilation pipe that is made up of the main pipe and then an external sleeve. Using some sharp scissors or a sharp knife if you trust yourself remove the external sleeve being extremely careful not to damage the actual pipe the picture above shows the outer removed.
7. Now with all three standoffs installed and the sleeve removed it's time to slide the vented plate in. Starting at the front of the engine slide the plate towards the rear making sure it goes under the rocker cover vent pipe.

8. With the plate slid all the way in, line up the slotted hole with the thread of the standoffs.


9. Place coil packs 2, 4 and 6 in the plate holes in the same orientation shown making sure they slide over the spark plugs until firmly in place and flush with the plate.

10. Using 3 of the supplied bolts secure the plate and the installed coil packs in place, leaving them slightly loose allowing angle adjustments.

11. Install coil packs 1, 3 and 5 in the same orientation as shown now using the last three bolts in the threaded hole to the lower left of the KF vent hole, again leaving them slightly loose allowing angle adjustments.

12. Finally it's time to install the loom that makes the magic happen. Lay the loom on top of the coil packs. Starting at coil 1 start to attach the loom plugs to the coil pack, a click will be heard once installed fully. The loom is preformed so that it's obvious which plug goes where. Coil 1 is the shorter of the two plugs at the start of the loom just in case you aren't sure where to start though and then from there, it will be obvious.
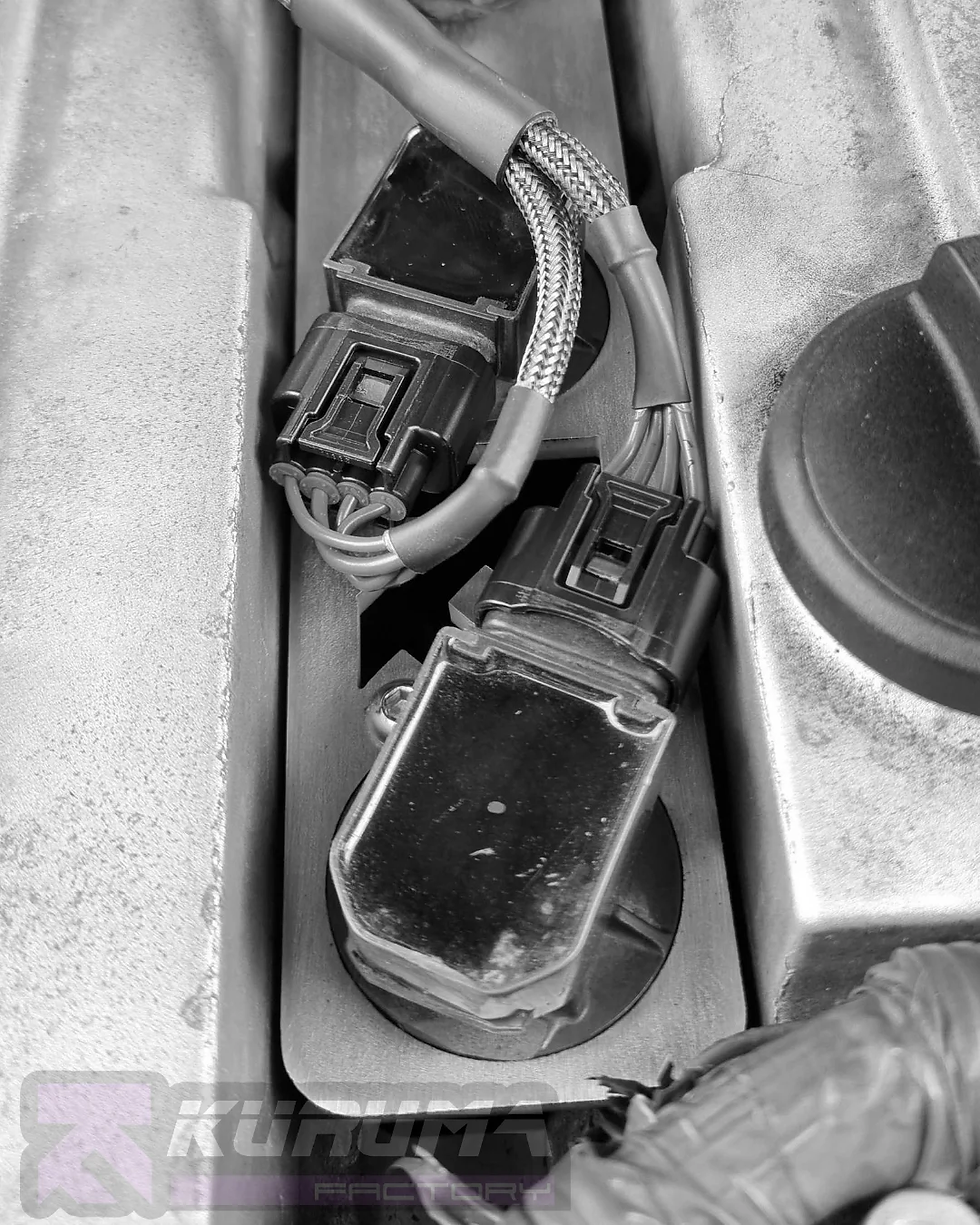
13. Now the loom is attached and the angle of the coil packs has been adjusted it's time to tighten the 6 bolts that hold the coils in place then lay the larger part of the loom between the coils.

14. Route the loom around the bay to the ignitor on the passenger suspension turret.
Depinning and rewiring to the new loom
1. Remove the ignitor plug from the ignitor
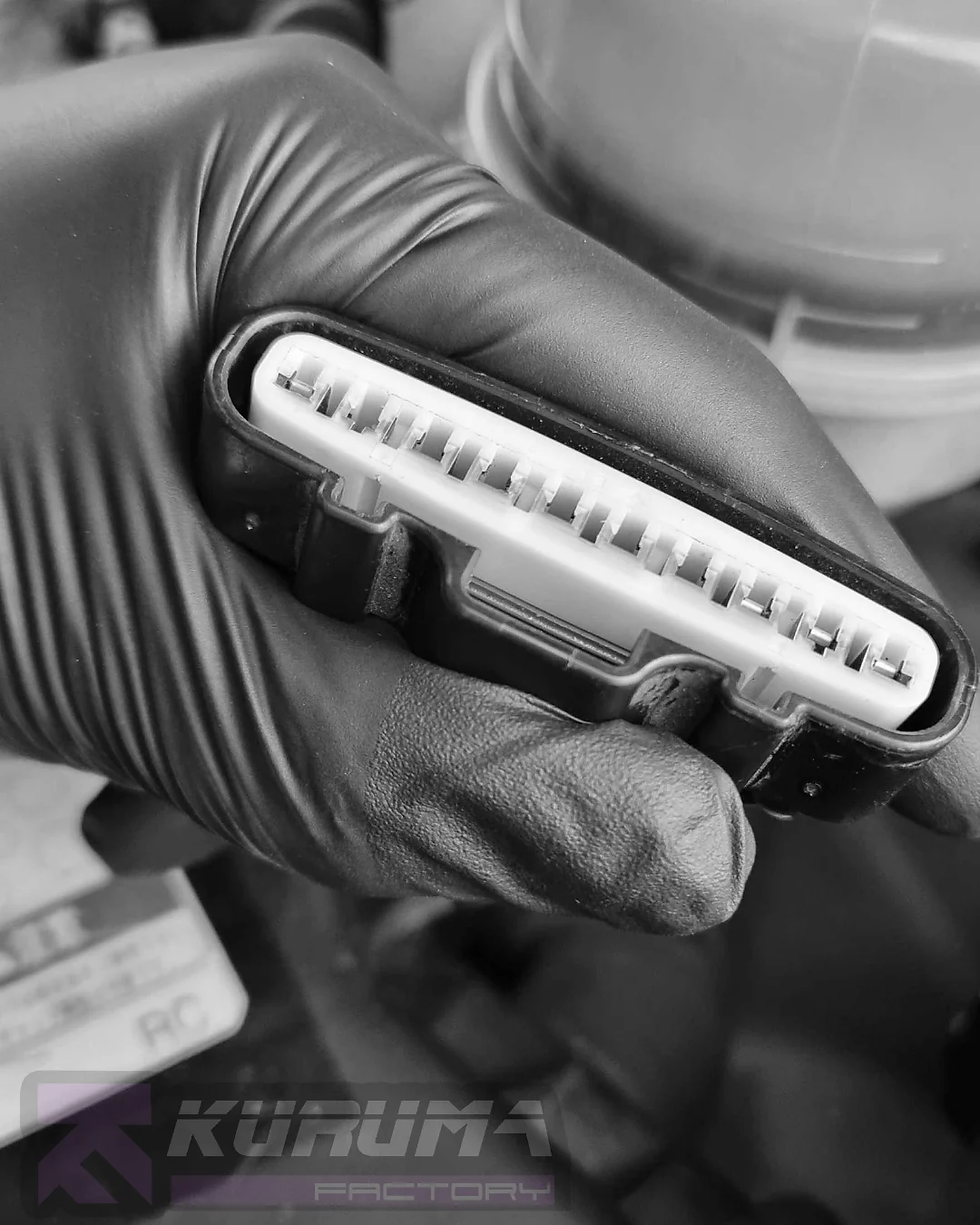
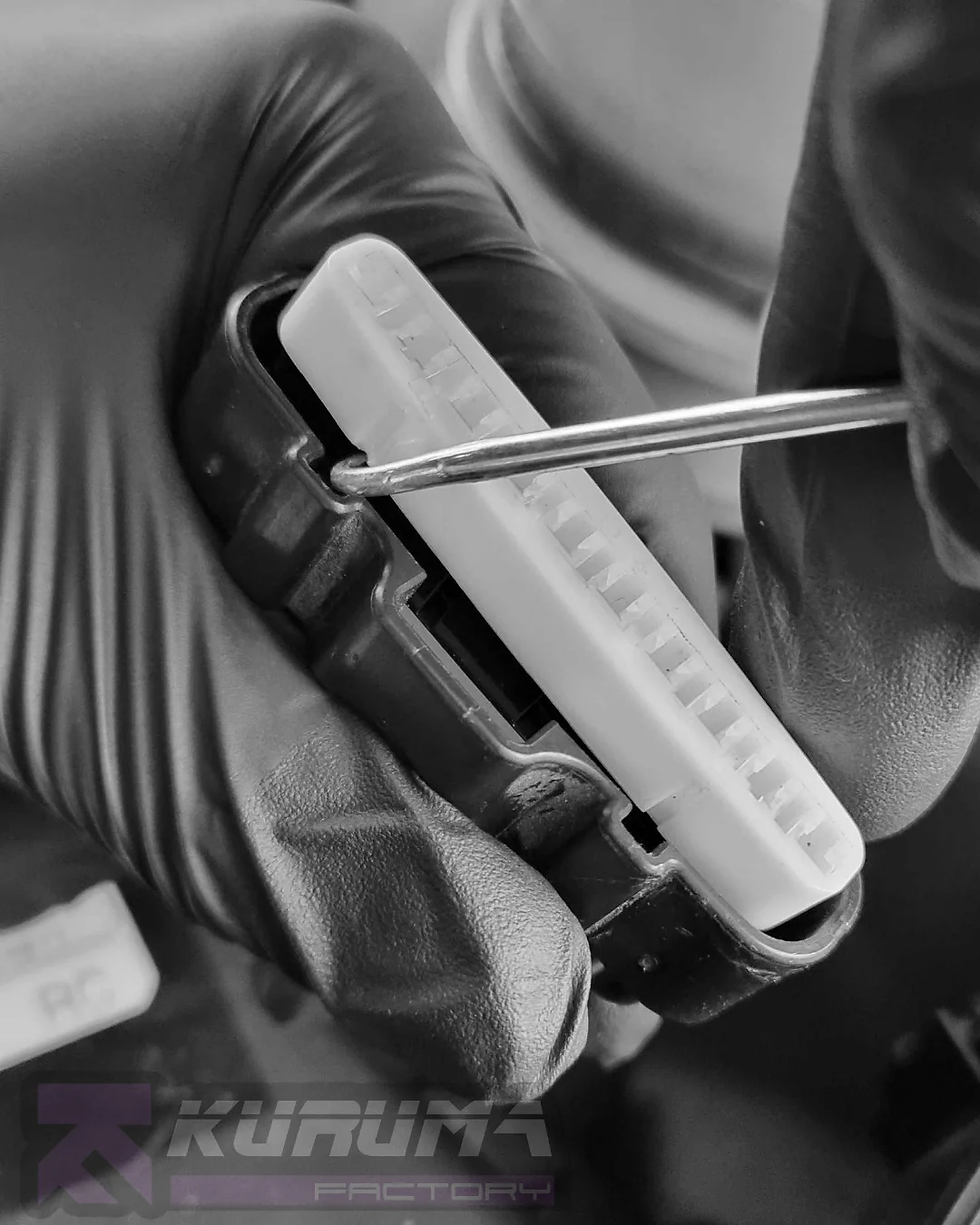
2. Inside the ignitor plug is the white retaining insert, this needs to be pulled forward and removed.
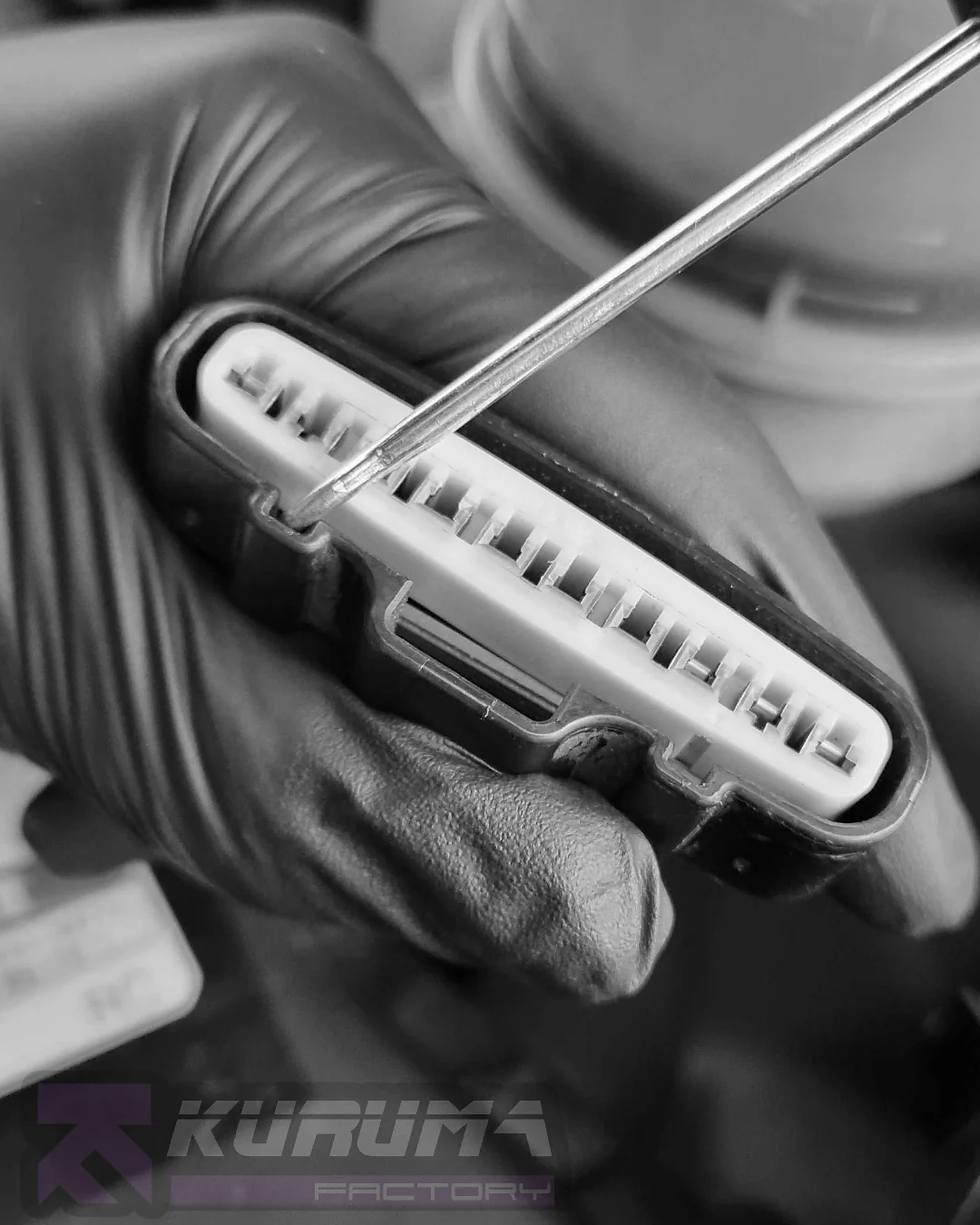
3. Using the depinning tool, insert into the grooves and lever forward a little each side at a time until it is fully removed.
4. Removing a few wires is required, we recommend this is done one at a time and only move on once the removed pin is located correctly in the new loom.
5. looking into the ignitor plug you will see a small lever below each pin, using the depinning tool move the lever away from the pin until you are able to gently pull the cable in turn sliding the pin out of the plug.

6. Now the pin has been removed locate the correct number on either the square 4-pin plug or the triangular 3-pin plug and with the wings on the pin facing down push the pin in to the hole until a click is heard.


7. Once all cables have been depinned and refitted to the new plugs it's time to push the white centres in on the plugs to lock the cables in place to their new home.


8. Plug in the adapted wiring to the main loom installed earlier.
Final steps
1. Now it's time to test your work, start the car ensuring good smooth running.
2. Refit the top engine cover and the centre plug garnish.
Your ignition system upgrade is now complete, safe in the knowledge it is now capable to handle more power and easier maintenance.


Comments